Click on the purple link below the video that reads --
"Heavenly Angel Luminary Now Available for Purchase!", to view the Buy Page for details about the Heavenly Angel Luminary.
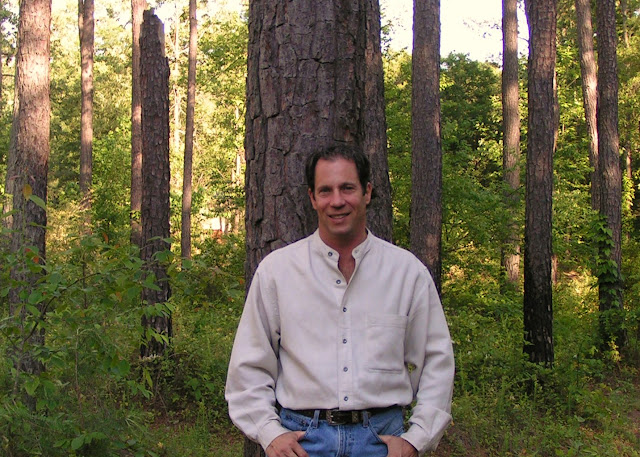
I handcraft each Angel luminary out of pure paraffin wax. These Angel Luminaries make wonderful gifts for friends and loved ones. Children love them as "night lights" in their bedrooms. I know, because my son won't go to sleep now without his "Angel" glowing in his room where he can see it.
Whether as a sympathy gift to someone who is sick or injured, or someone who just needs a positive lift because of events happening in their lives, these Angel Luminaries are a soothing reminder that "Angels are Watching Over Us". People find them to be a source of comfort, with their flickering glow lighting up the space around them.
They make a beautiful centerpiece when displayed, or just as an Angel companion on a bedside stand.
The Angel Luminaries are a brand new novel "Gift Idea". They are very unique, and should last many years as they light up with two flickering tea lights inserted inside of the wax sculpture. Since there are no wicks burning like a candle, the Angel sculptures will not degrade due to the heat of a flame melting the wax.
They are an inspirational gift that says, "You Care", and are thinking about your friend or loved one.
You simply break up different colored wax chunks, put them in a mold, and pour melted wax over them. This candle will harden faster than any other candle you may have poured, because the "chunks" are already hardened.
There are two ways to do make CHUNK candles:
{When you are finished reading this post, click on the LINK at the end, and go view the FREE Slide Show at www.moonvalleycandles.com . You will see the steps in making a "chunk" candle}.
1) Wick up a mold, pour in melted wax up to a level that will let you add "chunks" to fill up the rest of the mold to the top. Add whatever colored chunks you want, and pop it in a refrigerator, water bath, or freezer to cool it quickly. After letting the candle mold cool for 10-15 minutes (depends on the temperature), pull it out, and poke holes in it with a sharp "tool" to let any trapped air out. Add some more melted wax to "top it off", and place it back in your cooling area -- refrigerator, water bath, or freezer. It will be hard and ready to extract (de-mold) in a fairly short amount of time. Presto! Finished candle. Level the bottom of the candle on a hot skillet or pan, and set it on some waxed paper. Hold the candle upside down, and examine if the candle is level and flat. Making sure the skillet or pan is level first is a good idea, and makes this procedure a lot easier.
2) Wick up a mold, fill the mold with broken colored "chunks", and pour pure melted wax over the chunks, up to the top of the mold. Pull the mold out after 10-15 minutes of cooling, poke holes in it with a "tool" like a copper wick rod, knife, pencil, or whatever to let any trapped air out. Top it off with hot wax (160-175 degrees -- buy a wax thermometer to check the temperature). Having the wax fairly hot allows the new wax to "bond" to the already cooled wax.
THINGS TO CONSIDER:
1) The use of "color" is key to the appearance of your finished candle. You may have a color scheme you want to create... For example: You desire a candle with just two colors. Say, a light blue candle with yellow chunks. You know ahead of time, that any colored chunks will "bleed" their colors into newly poured hot wax. Okay. With this in mind, pour a light blue colored wax into your mold. Let it start to harden a little bit. You might put it in the refrigerator, water bath, or freezer for a few minutes. Check on it. When the outside starts to harden to maybe 1/8" or a1/4" inch, you pull your mold out, and drop in your yellow chunks. Put it back in your cooling space. Bring it out once again once it looks like it is hardening up well. Poke some holes in it. Top it off with more of your light blue wax, and put it back in your cooling space to finish hardening up. Soon, you will have a finished candle of light blue with yellow chunks. Keep in the back of your mind that blue and yellow mixed together makes "green". After some experimentation, you will understand how temperature and wax cooling interact to create different colors.
2) If you want specific colored chunks to work with, you'll have to "make" them. Get a cookie sheet or pan, line it with foil, and pour the colored wax of your choice into the pan. After it has cooled to a fairly thick viscous state, you can cut it into pieces by drawing a knife through it. Put it back in your refrigerator or freezer to harden completely. It will then be easy to break it up into colored chunks. You can also use cookie cutter designs to "stamp" out shapes you like prior to the wax hardening in your cookie sheet or pan. There are many inexpensive cookie cutter designs you can find at hobby stores for instance. Hearts, clovers, angels, circles, squares, stars, whatever you like. We call these "embeds". Because you would fill your candle mold up with melted wax, let it harden a bit, and then "embed" or place the chunks along the outer edges of the mold. You can use chopsticks for example to place the chunks along the sides of the mold so they will be visible in your finished candle. Put your mold back into the cooler soon after embedding the chunks to harden them in place.
3) Check out the FREE slide show I have for you on my website at www.moonvalleycandles.com. You can access it by clicking on the lime green copy on the right side of the homepage. It says -- it says "Free 6 minute slide show, Click Here". Put in your email address, and watch the slide show. These are the basic steps to making a chunk candle.
Candles make Great Gifts! They also qualify as one of the most Inexpensive Gifts to make. Christmas is right around the corner, and everyone is starting to think about all the gifts they need to buy for family and friends.
Hand-Made Candles that you can make at home, are a Great Alternative to the crazed shopping mall dilemma!
For most people, gone are the old days of shopping retail for gifts. Wandering shopping malls for hours looking for the perfect gift for someone requires “time”, and most people don’t have a lot of that precious commodity anymore. Plus, it is a hassle driving, parking, walking, shopping and price comparing, waiting in line, and then…paying retail for something the person you are shopping for may not even like! What a pain.
One of the BEST GIFT IDEAS I’ve ever come across are CANDLES. Candles that YOU can make at home! It is something you can do with friends, a spouse, or with your children. Put on some Holiday Music, and let your creativity flow!
Why do I love making candles?! Let me count the ways:
Appreciation -- Everybody loves a hand-crafted gift.
Time Investment -- You can make a batch of personalized candles in about an hour and a half.
Relative cost -- Your cost is well under $5 per candle. (Once you have your initial candle making supplies).
Real & Perceived Value – If you were to buy a finished candle in a store it would cost you between $15 and $30 dollars for a nice one.
Personalization -- Your hand-made gift says, “I care enough about you to take the time to make you something original and special!” Personalize your candles by choosing colors, scents, and designs your family and friends would love. Your hand-made gift will be much appreciated.
What does it cost to make a candle?
You can make a batch of personalized candles in about an hour and a half
(BOOM! Gifts for everyone in a fraction of the time it would take to go shopping. They’ll cost you about 10% of what you’d spend for a retail gift). Look Below:
Typical cost for 1 aluminum mold -- $10.00 {Most molds will hold up if taken care of, and allow you to make hundreds of candles from each mold}
Electricity, miscellaneous costs, like packaging, burning instructions labels -- $.25. You can spend a lot on fancy packaging, but that will be your choice.
Your Time (labor) – Obviously, this varies with each individual person.
>Once you buy your initial candle supplies, you will be reusing the molds, wick rods, wick screws, etc. Your hard costs for these items should be averaged or amortized over the “life span” of the items. For example: If I make 100 candles ( a conservative estimate ) from one mold which initially cost me $10.00, then my cost per candle is just a dime ($.10).
A Small Cost and a High Value -- The ingredients and expenses that go into making just one single candle weighing about 1 pound are – $2.25 (I took the high figures from the rough estimates above).
at a wholesale price of $14.00. My profit would then be $14.00 minus $2.25 = $11.75 profit.
The retail store would “double” their cost, and sell the candle at a retail price of $28.00.
Value Added -- Looked at another way – for $2.25 of tools and ingredients + your time, you can create a candle as a GIFT that someone would have to pay $28.00 + tax for in a retail store!
Many times, I would pour 30-40 candles at a time (yes, I had that many molds), and take them through the steps I teach you in our Instructional Videos available on our website at www.moonvalleycandles.com . I would also buy my supplies in bulk, so my cost per candle is even less.
Consider, that basically you are taking some wax and string, adding a little scent and some color, and that is a candle! But note – it is in HOW you put things together that establishes its worth. A painting is just a piece of canvass with some oil paint on it. Its value is established by the artistry and thought that goes into combining the basic elements. So it is with candles.
I really want to impress your mind with the understanding of the profit margins and value that are available with hand-made candles that are unique and well-crafted. Whether you make them for gifts or for sale, they are hand-made works of art, prized by those who own them. A very high value is attached to them, even though the cost to make them is relatively small.
*** You should note that we are selling our Instructional Videos on our website at www.moonvalleycandles.com, for the retail price of just 1 candle. A fantastic bargain by any standards! Order your video today, and you will learn the “secrets” to making high-value candles. Candle-making is a Blast!
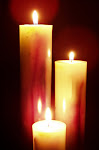
With Our "Garden Candle" Video Instructions You Can Create Your Own Beautiful Candles Any Time You Want!
We Made These Lovely Centerpiece Candles this Morning, Just to Show You How Easy It Is to Change With the Seasons!
You'll Find the "Garden Candle" Video Download at:
http://www.moonvalleycandles.com/buy-videos.php
I guarantee you the video is packed with easy-to-follow directions to making beautiful and original "Garden Candle" designs, plus we have made it very entertaining to watch! I brought in a young couple who had never made a candle before, and walked them through the steps of making "Garden" candles.
They had a lot of fun learning how to make these beautiful candles. Why buy "gifts" when you can make your own at home for 1/10th the cost?! Learn the secrets of professional candle-making with our entertaining Moon Valley Candles' Instructional Videos -- Go Towww.moonvalleycandles.com
Candle - Making Provides You an Outlet for Your Creativity!
COLOR is the KEY
when you're havingFUN
MAKING CANDLES!
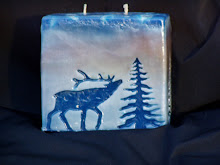
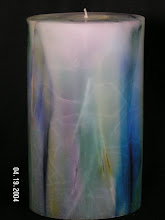
I call the green candle on the
left an "Emerald Jewel",
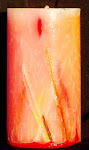
and the golden candle
below an "Autumn Jewel".
I hope you can appreciate them. They are two new "first try" experiments I recently attempted. Up close, they look like glass or marble with a an incredible "depth" to the different colors embedded in them. They display some unique properties I discovered with a recent blend of wax I tried out. Soon, you will find available an Instructional Video for this New "Jewel" Line at www.moonvalleycandles.com!
Color Your World with Your Own Hand-Crafted Candles!
Summer is winding down, and we're moving into cooler weather and the Holiday Season. This is a great time to bring out the fall colors of Autumn.
The rich tones of browns, yellows, reds, rusts, gold and other colors are beautifully displayed in the candles you create at home. Use your creativity to celebrate the Harvest Season. Any of our candle designs can be transformed into a "seasonal" centerpiece, just by changing the colors.
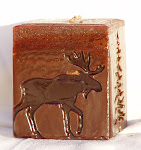
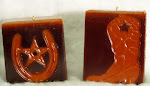
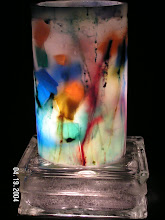
Below, are a few creations that we sold through several boutique stores. They make great centerpieces or accents to seasonal decor...
We'll teach you the secrets to making beautiful candles in our fun-filled Instructional Videos. Go to www.moonvalleycandles.comToday, and pick out the kind of candles you want to make. We guarantee you'll enjoy your new found talent!
I'm very excited to introduce you to our NEW WEBSITE where you will be able to download Instructional Videos to take your candle making to new heights of artistry!
Click on the menu tabs on the left and take a look at the different candle styles we've created. On the right side of the Home Page, you will find a FREE Introductory download slide show of "How to Make a Candle". Click on the purple candle, and provide your name and email address to access it. {Turn on your audio to hear the music -- Enjoy!} Make sure and download the FREE "How to Get Started Making" Candle Supplies List document.
We will let you know about upcoming products and items of interest as this site matures. I have loads of unique candle-making insights to share with you!
This blog, and our instructional videos will help you turn your candles from ordinary into Extraordinaryworks of art!
This is a forum to introduce you to new ideas and creative people who want to learn and share their ideas about candle-making. You will be able to post your questions, and share your creative candle ideas and candle photos here.
Whether you are new at candle-making or a pro, you're going to find this blog and my website to be inspirational and invaluable.
My expertise in candle-making was learned over many years. There is much that I will be able to teach you -- and I in turn, will learn from you!
From the creative side to the business side, candle-making is a rewarding experience.
So...please make a favorite and bookmark this blog as well as my website at www.moonvalleycandles.com.
Tell your friends how to find us! I'm looking forward to this "Creative Journey" with you!


